Common Texture Art Mistakes and How to Fix Them | RanggatCategoriesCreative

Common Texture Art Mistakes and How to Fix Them | Ranggat

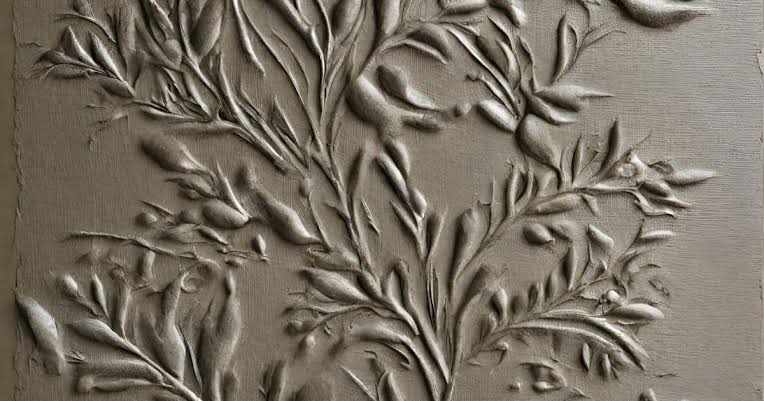
Texture art can transform a simple canvas into a beautiful, dimensional artwork. However, beginners often face issues such as uneven texture, cracks, poor adhesion, or an untidy finish. Understanding these common mistakes can help artists create smoother and more professional-looking texture paintings.

1. Applying Texture Too Thickly

One of the most common mistakes is applying a very thick layer of texture paste at once. A heavy layer may take longer to dry and can develop cracks or uneven surfaces.

How to fix it:
Apply the paste in controlled layers. Allow each layer to dry properly before adding another.

2. Using the Wrong Surface

Texture materials may not work well on every surface. A poorly prepared canvas or board can affect adhesion and the final appearance.

How to fix it:
Prepare the surface before starting. Clean it properly and use a suitable primer when required.

3. Not Allowing Enough Drying Time

Painting over texture before it is completely dry can damage the design and cause the layers to mix.

How to fix it:
Allow the texture to dry naturally and completely before adding acrylic paint or decorative details.

4. Creating Uneven Texture

Inconsistent pressure while using palette knives, brushes, or texture tools can result in an uneven finish.

How to fix it:
Practice maintaining consistent pressure and experiment with different tools to achieve the desired texture.

5. Ignoring Cracks

Small cracks can appear when texture paste is applied too thickly, dries too quickly, or is used on an unsuitable surface.

How to fix it:
Use thinner layers and provide adequate drying time. For minor cracks, gently smooth the damaged area and reapply texture.

6. Using Too Many Colors

Adding too many colors can make a textured artwork look crowded and reduce the visual impact of the texture.

How to fix it:
Choose a simple color palette and use contrasting or complementary shades to highlight the raised details.

7. Poor Tool Selection

Different texture effects require different tools. Using the wrong tool may make it difficult to create clean patterns or detailed designs.

How to fix it:
Experiment with palette knives, spatulas, combs, brushes, and other texture tools to discover which works best for your design.

8. Rushing the Finishing Process

Texture art requires patience. Rushing through drying, painting, or finishing can affect the overall quality.

How to fix it:
Work step by step and allow enough time between each stage. A patient approach helps achieve a cleaner and more durable finish.

Texture art becomes easier with practice and the right techniques. By avoiding common mistakes such as applying excessive paste, skipping surface preparation, and rushing the drying process, artists can create beautiful and long-lasting textured artworks.

With quality art materials and regular practice, your creativity can turn simple textures into impressive works of art. Ranggat offers materials that can help artists explore different painting and texture techniques with confidence.

Acrylic vs Texture Paste: What’s the Difference?CategoriesCreative

Acrylic vs Texture Paste: What’s the Difference?

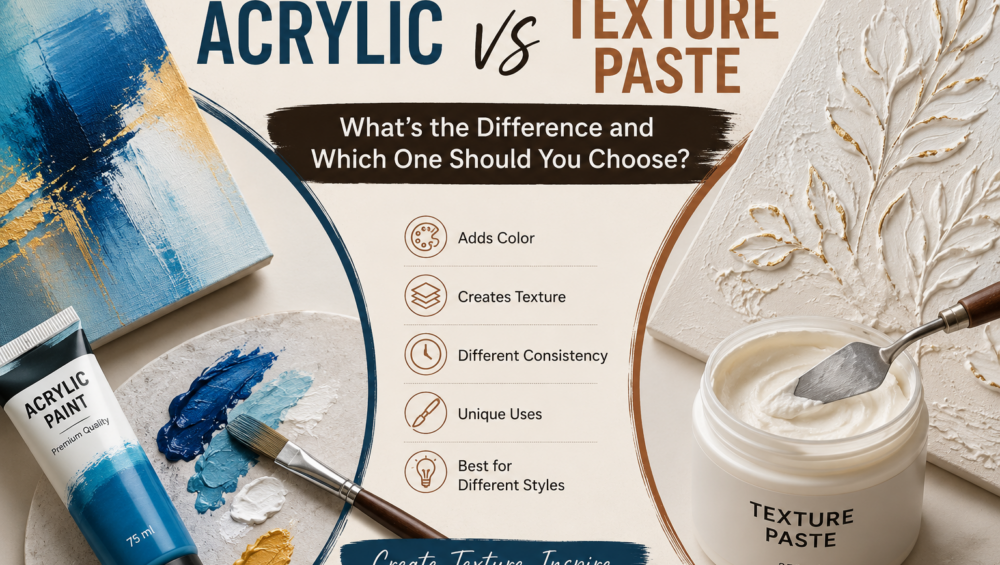
When it comes to painting and modern artwork, both acrylic paint and texture paste are popular materials. However, they serve different purposes. Acrylic paint is mainly used to add colour, detail, and smooth layers, while texture paste is designed to create depth, raised surfaces, and three-dimensional effects.

Understanding the difference between the two can help artists choose the right material for their painting style and project.

What Is Acrylic Paint?

Acrylic paint is a water-based paint known for its vibrant colours, quick drying time, and versatility. It can be applied to surfaces such as canvas, paper, wood, and prepared boards.

Acrylic paint can be used for:

  • Background painting
  • Detailed artwork
  • Abstract paintings
  • Portraits and landscapes
  • Colour layering and blending
  • Decorative and mixed-media projects

Its consistency can range from fluid to heavy-body, depending on the product. Acrylic paint can also be combined with different mediums to change its texture, transparency, or finish.

What Is Texture Paste?

Texture paste is a thick acrylic-based medium used to create raised textures and three-dimensional effects. It is generally thicker than acrylic paint and can hold shapes, ridges, peaks, and patterns after application.

Artists commonly apply texture paste with a palette knife, spatula, stencil, or stiff brush. It can be applied directly to the surface and painted after it dries, or mixed with acrylic paint to create coloured texture.

Texture paste is particularly useful for:

  • 3D wall art
  • Abstract textured paintings
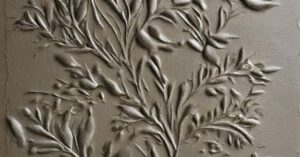
  • Raised floral designs
  • Geometric patterns
  • Impasto effects
  • Sculptural details
  • Mixed-media artwork

Acrylic vs Texture Paste: Key Differences

FeatureAcrylic PaintTexture Paste
Main purposeAdding colour and detailsCreating texture and dimension
ConsistencyFluid to thickVery thick and mouldable
ColourAvailable in many coloursUsually white or neutral
TextureMostly smooth or brush-texturedCreates raised, tactile surfaces
ApplicationBrush, roller, palette knifePalette knife, spatula, stencil
3D effectLimited unless thickenedExcellent for raised effects
DryingGenerally dries quicklyUsually takes longer depending on thickness
Best forColour, details and layeringRelief, depth and sculptural effects

Can You Use Acrylic Paint With Texture Paste?

Yes. Combining acrylic paint with texture paste is one of the most useful techniques for textured artwork. The paste can be mixed with acrylic colour before application, or artists can allow the paste to dry first and then paint over it.

For example, an artist may first create raised floral shapes with white texture paste. Once completely dry, acrylic colours can be added over the textured surface to highlight the raised areas.

Keep in mind that mixing paint into an opaque white paste can change the appearance and intensity of the original colour.

Which One Should You Choose?

The right choice depends on the effect you want to create.

Choose Acrylic Paint If:

  • You mainly need vibrant colours.
  • You want to create detailed artwork.
  • You need smooth backgrounds.
  • You want to blend or layer colours.
  • You are painting portraits, landscapes, or illustrations.

Choose Texture Paste If:

  • You want a raised 3D effect.
  • You are creating modern textured wall art.
  • You want visible ridges, peaks, or patterns.
  • You want to build sculptural details.
  • You want to experiment with palette-knife techniques.

How to Use Texture Paste With Acrylic Paint

A simple technique is to apply texture paste to your prepared canvas using a palette knife. Create your desired shapes, lines, or patterns and allow the paste to dry completely. Once dry, apply acrylic paint over the textured surface.

You can also mix a small amount of acrylic paint into the paste before applying it. Different tools, such as combs, forks, brushes, and palette knives, can create different patterns and textures.

Tips for Better Textured Artwork

1. Build texture gradually:
For deeper effects, building several suitable layers can be safer than applying one extremely thick layer.

2. Let each layer dry:
Thick applications take longer to dry than regular acrylic paint. Drying time depends on the thickness and specific product.

3. Use the right surface:
Choose a stable, properly prepared surface. Some hard texture pastes may be less suitable for flexible surfaces when applied very thickly.

4. Experiment with tools:
Palette knives, combs, stencils, sponges, and stiff brushes can produce very different effects.

5. Paint after drying:
If you want strong colour contrast, allow the texture paste to dry before applying acrylic paint over it.

Acrylic paint and texture paste are not competing materials—they work extremely well together. Acrylic paint provides colour, detail, and visual expression, while texture paste adds physical depth and dimension.

If your goal is a smooth, colourful painting, acrylic paint may be all you need. If you want modern 3D wall art, raised patterns, or tactile textures, texture paste is the better choice. For the most creative results, try combining both materials in the same artwork.

Acrylic vs Texture Paste: What's the Difference and Which One Should You Choose?CategoriesCreative

Acrylic vs Texture Paste: What’s the Difference and Which One Should You Choose?

Texture plays a big role in modern art and home décor. Whether you are creating canvas paintings, wall décor, or DIY crafts, choosing the right medium can make a huge difference. Two of the most popular options are acrylic and texture paste. While both are used in artwork, they serve different purposes.

In this guide, we’ll explain the difference between acrylic paint and texture paste in simple language, helping you choose the right one for your next creative project.

What Is Acrylic Paint?

Acrylic paint is a fast-drying, water-based paint made with acrylic polymer. It is available in many colors and is loved by artists because it is easy to use and dries quickly.

Features of Acrylic Paint

  • Available in hundreds of colors
  • Smooth and creamy texture
  • Quick drying
  • Water-resistant after drying
  • Easy to mix with other colors
  • Suitable for canvas, wood, paper, fabric, and walls

Best Uses of Acrylic Paint

  • Canvas paintings
  • Wall art
  • DIY home décor
  • Abstract paintings
  • Portraits
  • Decorative crafts

What Is Texture Paste?

Texture paste is a thick white paste used to create raised patterns and 3D effects. It is not a paint but a textured medium that adds depth and dimension to artwork.

Once the texture paste dries, it can be painted using acrylic colors.

Features of Texture Paste

  • Thick and heavy consistency
  • Creates raised designs
  • Dries into a hard surface
  • Can be shaped using palette knives and stencils
  • Perfect for 3D artwork

Best Uses of Texture Paste

  • Modern textured paintings
  • Abstract wall art
  • Floral texture art
  • Geometric designs
  • Home décor pieces

Acrylic vs Texture Paste: Key Differences

FeatureAcrylic PaintTexture Paste
PurposeAdds colorCreates texture
ConsistencySmoothThick
FinishFlat or slightly texturedRaised 3D effect
Drying TimeFastLonger than acrylic
Can Be Painted?Already coloredYes, after drying
Best ForTraditional paintingsModern textured artwork

Which One Should You Choose?

The answer depends on your project.

Choose Acrylic Paint If:

  • You want bright and vibrant colors.
  • You are creating traditional paintings.
  • You prefer smooth artwork.
  • You need quick drying.

Choose Texture Paste If:

  • You love 3D artwork.
  • You want premium wall décor.
  • You enjoy abstract and modern art.
  • You want to create unique surface designs.

Can You Use Both Together?

Absolutely!

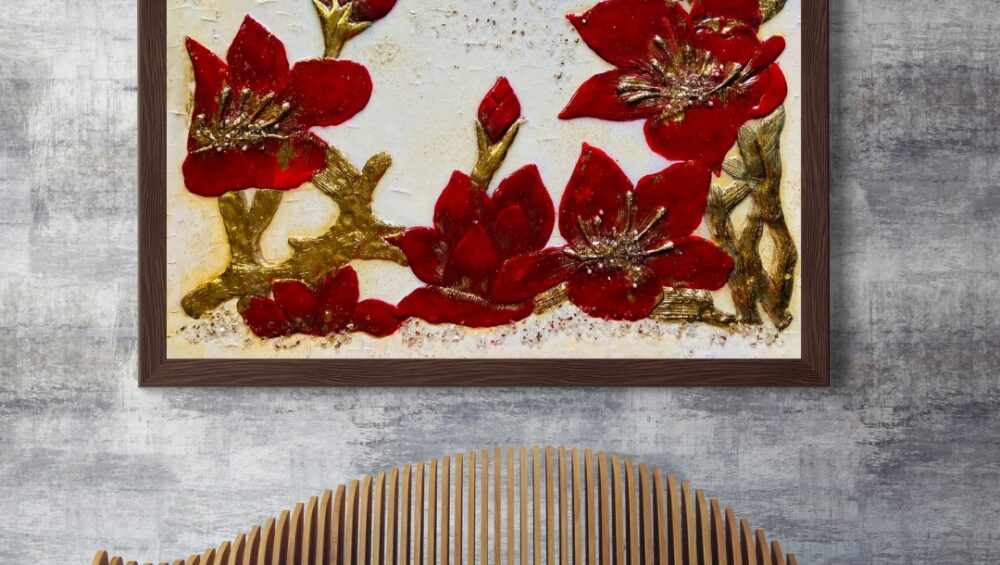
Many professional artists first apply texture paste to create raised patterns. After it dries completely, they paint over it using acrylic colors. This combination creates stunning textured artwork with vibrant colors.

This is one of the most popular techniques used for:

  • Luxury wall décor
  • Resin-inspired art
  • Floral canvas paintings
  • Modern abstract art
  • Handmade home décor

Tips for Beginners

  • Start with a small canvas for practice.
  • Let texture paste dry completely before painting.
  • Use a palette knife instead of a brush for applying texture paste.
  • Apply acrylic paint in thin layers for better results.
  • Seal finished artwork with varnish for long-lasting protection.

Common Mistakes to Avoid

  • Painting over wet texture paste.
  • Applying very thick layers that crack while drying.
  • Using poor-quality materials.
  • Not allowing enough drying time.
  • Skipping the final protective varnish.

Frequently Asked Questions (FAQs)

1. Is texture paste the same as acrylic paint?

No. Acrylic paint adds color, while texture paste creates raised textures.

2. Can I mix acrylic paint with texture paste?

Yes. You can mix small amounts of acrylic paint into texture paste to create colored textures.

3. Which is better for beginners?

Acrylic paint is easier for beginners, while texture paste is ideal once you’re comfortable experimenting with texture.

4. Does texture paste crack?

High-quality texture paste usually does not crack if applied in thin, even layers and allowed to dry properly.

5. Can I paint over dried texture paste?

Yes. Acrylic paint works beautifully over dried texture paste.

Both acrylic paint and texture paste are excellent art materials, but they have different purposes. Acrylic paint brings your artwork to life with rich colors, while texture paste adds depth, dimension, and a premium 3D look. For the best results, many artists use them together to create eye-catching modern art.

Whether you’re a beginner or an experienced artist, understanding the difference between acrylic paint and texture paste will help you choose the right material for your creative projects and achieve beautiful, professional-looking artwork.

Ranggat brings creativity to life with handcrafted contemporary resin and textured artwork for modern homes.

How to Make Texture Paste at Home: Easy DIY Recipe for Beautiful Textured ArtCategoriesCreative

How to Make Texture Paste at Home: Easy DIY Recipe for Beautiful Textured Art

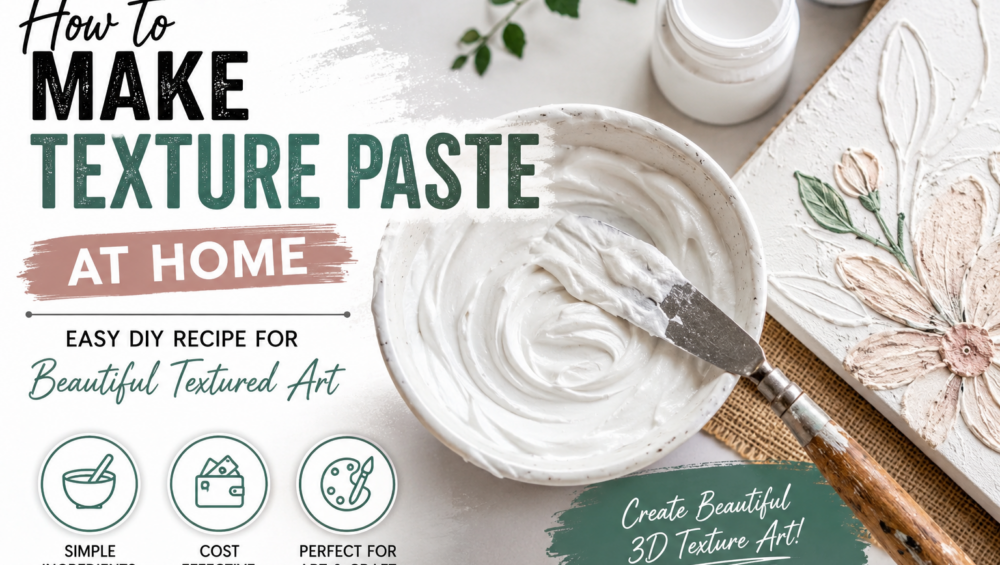
Texture art has become one of the most popular forms of creative expression. From abstract wall art to floral canvas designs, texture paste helps artists create stunning 3D effects and unique patterns. While ready-made texture paste is available in stores, you can easily make your own texture paste at home using simple and affordable ingredients.

In this guide, we’ll show you how to create homemade texture paste and use it to make beautiful textured artwork.

What is Texture Paste?

Texture paste, also known as modeling paste, is a thick medium used in painting and mixed-media art to create raised designs, depth, and dimension on surfaces like canvas, wood, and paper. Artists often use palette knives, stencils, and brushes to shape the paste into creative patterns.

Benefits of Making Texture Paste at Home

  • Cost-effective compared to store-bought products
  • Easy to prepare with household materials
  • Customizable thickness and texture
  • Perfect for beginners and professional artists
  • Great for canvas art, wall décor, and craft projects

DIY Texture Paste Recipe

Ingredients

  • 1 part White PVA Glue
  • 1 part Plaster of Paris (POP)
  • Small amount of water (if needed)

This simple combination creates a thick, durable paste suitable for textured artwork.

Alternative Recipe

If you don’t have POP, you can use:

  • 3 parts Baking Soda
  • 1 part PVA Glue
  • 1 part Acrylic Paint

This mixture creates a smooth texture paste that works well with stencils and decorative artwork.

Step-by-Step Instructions

Step 1: Mix the Ingredients

Take a clean bowl and combine the glue and Plaster of Paris. Stir thoroughly until the mixture becomes smooth and lump-free.

Step 2: Adjust Consistency

If the paste feels too thick, add a few drops of water and mix again. The ideal consistency should resemble thick frosting.

Step 3: Add Color (Optional)

Mix acrylic paint into the paste if you want colored texture paste. This saves painting time later and creates a more uniform finish.

Step 4: Apply to Your Surface

Use a palette knife, spatula, or stencil to apply the texture paste to canvas, MDF boards, wood panels, or craft surfaces.

Step 5: Let It Dry

Allow the artwork to dry completely. Drying time depends on the thickness of the application, but most textured designs dry within 12–24 hours.

Creative Ways to Use Texture Paste

1. Floral Texture Art

Create elegant flowers and petals using a palette knife. This style is widely used in modern home décor.

2. Abstract Wall Art

Experiment with waves, curves, and geometric patterns to create luxury textured paintings.

3. Stencil Designs

Apply texture paste through stencils to create precise and professional-looking patterns.

4. Mixed Media Projects

Combine texture paste with paints, metallic finishes, and decorative elements for unique artwork.

Tips for Best Results

  • Use fresh texture paste immediately after mixing.
  • Avoid adding too much water.
  • Work on sturdy surfaces like canvas or wood.
  • Allow complete drying before painting.
  • Seal finished artwork with a protective varnish for durability.

Common Mistakes to Avoid

  • Making the paste too watery
  • Applying overly thick layers that may crack
  • Painting before the paste has fully dried
  • Using weak or low-quality glue

Making texture paste at home is simple, affordable, and incredibly rewarding. With just a few basic ingredients, you can create beautiful textured paintings, wall décor pieces, and creative craft projects. Whether you’re a beginner exploring textured art or an experienced artist looking to save costs, homemade texture paste is an excellent solution.

At Ranggat, we believe creativity should be accessible to everyone. Try this DIY texture paste recipe today and transform ordinary canvases into stunning works of art.

Incorporate Texture artCategoriesCreative

What Is Texture Art? A Complete Beginner’s Guide

Texture art has become one of the biggest trends in modern home décor and contemporary art. From elegant minimalist wall pieces to bold abstract creations, textured artwork adds depth, dimension, and personality to any space. Whether you’re an aspiring artist or simply looking for a creative hobby, texture art is an accessible and rewarding way to express yourself.

In this complete beginner’s guide, we’ll explore everything you need to know about texture art—from its definition and history to the materials, techniques, and tips that will help you create your very first masterpiece.

What Is Texture Art?

Texture art is a form of visual art that emphasizes the physical surface of an artwork by creating raised, three-dimensional patterns and designs. Unlike traditional paintings that rely mainly on colors and brushstrokes, texture art uses thick mediums such as texture paste, modeling paste, plaster, or joint compound to create depth that can often be seen and felt.

The beauty of texture art lies in its simplicity. Many textured artworks use neutral color palettes like white, beige, grey, or earth tones, allowing the texture itself to become the focal point.

Why Is Texture Art So Popular?

Texture art has gained popularity because it combines creativity with modern interior design. Homeowners, interior decorators, and DIY enthusiasts love textured wall art because it:

  • Creates depth and dimension
  • Looks luxurious and sophisticated
  • Matches modern, Scandinavian, and minimalist interiors
  • Is beginner-friendly
  • Requires minimal painting experience
  • Offers endless creative possibilities

Social media platforms have also played a major role in making texture art one of today’s fastest-growing DIY art trends.

Types of Texture Art

There are many styles of texture art that beginners can explore.

1. Abstract Texture Art

The most popular style, featuring flowing curves, waves, arches, and organic patterns.

Best For:

  • Living rooms
  • Bedrooms
  • Office walls

2. Floral Texture Art

Artists sculpt flowers such as roses, lilies, daisies, or peonies using texture paste to create elegant floral compositions.

3. Landscape Texture Art

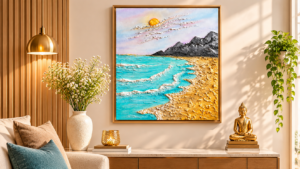
Mountains, oceans, sand dunes, forests, and sunsets become more dramatic with raised textures.

4. Geometric Texture Art

Modern patterns using clean lines, circles, squares, and repeated shapes.

Perfect for contemporary homes.

5. Minimalist Texture Art

Simple monochrome artwork with subtle ridges and soft curves.

One of the most popular styles for luxury interiors.

Materials Needed for Texture Art

One reason beginners love texture art is that it requires only a few basic supplies.

Essential Materials

  • Canvas
  • Texture Paste or Modeling Paste
  • Palette Knife
  • Putty Knife
  • Acrylic Paint
  • Gesso Primer (optional)
  • Sandpaper
  • Paint Brushes
  • Water Container
  • Protective Sheet

Many artists also experiment with household tools such as combs, forks, cardboard, or sponges to create unique textures.

Basic Texture Art Techniques

Palette Knife Technique

The most common method.

Spread texture paste across the canvas and create movement using smooth strokes.

comb Technique

Use a comb to create repeated ridges or wave patterns.

Perfect for beginners.

Spatula Technique

Create dramatic peaks and layered textures using a wide spatula.

Stencil Technique

Apply texture paste over stencils to produce detailed patterns.

Layering Technique

Apply multiple layers after each one dries for added depth and complexity.

Step-by-Step Guide to Creating Texture Art

Step 1: Prepare Your Canvas

Ensure the canvas is clean and dry.

Step 2: Mix Your Texture Paste

If required, mix your texture paste until smooth.

Step 3: Apply the Paste

Spread it evenly using a palette knife.

Step 4: Create Patterns

Experiment with:

  • Waves
  • Arches
  • Leaves
  • Flowers
  • Circular movements
  • Abstract lines

Step 5: Let It Dry

Drying usually takes several hours, depending on thickness.

Avoid touching it while drying.

Step 6: Paint (Optional)

Many artists leave texture art white, while others add acrylic colors, metallic finishes, or subtle gradients after the texture has cured.

Step 7: Seal the Artwork

Apply a clear varnish to protect the surface and enhance durability.

Common Mistakes Beginners Should Avoid

Applying Too Much Paste

Very thick layers may crack while drying.

Working Too Slowly

Texture paste begins drying quickly.

Overworking the Surface

Too many strokes can ruin the design.

Ignoring Drying Time

Patience leads to cleaner results.

Using Low-Quality Canvas

A sturdy canvas supports heavier textured materials better.

Best Color Combinations for Texture Art

Popular modern color palettes include:

  • White on White
  • Beige & Cream
  • Grey & White
  • Black & White
  • Terracotta & Sand
  • Olive Green & Beige
  • Gold & Ivory
  • Sage Green & Neutral Tones

Where Can Texture Art Be Used?

Texture artwork enhances many spaces:

  • Living Rooms
  • Bedrooms
  • Hallways
  • Dining Areas
  • Offices
  • Hotels
  • Cafés
  • Restaurants
  • Luxury Apartments
  • Art Galleries

Its versatility makes it suitable for both residential and commercial interiors.

Is Texture Art Easy for Beginners?

Absolutely.

Texture art is considered one of the easiest forms of contemporary art because it focuses more on movement, patterns, and surface design than realistic drawing. Even complete beginners can create stunning pieces with basic tools and a little practice.

Tips for Beginners

  • Start with simple abstract patterns.
  • Practice on small canvases first.
  • Experiment with different tools.
  • Keep your designs clean and balanced.
  • Allow each layer to dry fully.
  • Learn from each artwork rather than aiming for perfection.

Frequently Asked Questions (FAQs)

What is texture art?

Texture art is a style of artwork that uses raised materials to create visible and tactile depth on a surface.

What materials are used for texture art?

Common materials include texture paste, modeling paste, plaster, acrylic paint, palette knives, and canvas.

Can beginners create texture art?

Yes. Texture art is one of the easiest and most beginner-friendly art forms because it focuses on shapes and textures rather than realistic drawing.

How long does texture art take to dry?

Depending on the thickness of the paste, drying may take anywhere from a few hours to 24 hours or longer.

Can texture art be painted?

Yes. Many artists paint their textured artwork after it dries, while others prefer elegant monochromatic finishes.

Texture art is more than just a design trend—it’s a creative way to bring movement, depth, and personality into your artwork and your living spaces. Whether you prefer minimalist white sculptures, floral reliefs, or bold abstract patterns, texture art offers endless opportunities to experiment and express your creativity.

The best part is that you don’t need years of artistic experience to begin. With a canvas, texture paste, and a few simple tools, you can start creating unique textured masterpieces that reflect your own style. Practice consistently, explore different techniques, and enjoy the process of turning ordinary surfaces into extraordinary works of art.

Ranggat – Where Creativity Meets Texture, Color, and Timeless Art.