Acrylic vs Texture Paste: What’s the Difference?CategoriesCreative

Acrylic vs Texture Paste: What’s the Difference?

When it comes to painting and modern artwork, both acrylic paint and texture paste are popular materials. However, they serve different purposes. Acrylic paint is mainly used to add colour, detail, and smooth layers, while texture paste is designed to create depth, raised surfaces, and three-dimensional effects.

Understanding the difference between the two can help artists choose the right material for their painting style and project.

What Is Acrylic Paint?

Acrylic paint is a water-based paint known for its vibrant colours, quick drying time, and versatility. It can be applied to surfaces such as canvas, paper, wood, and prepared boards.

Acrylic paint can be used for:

  • Background painting
  • Detailed artwork
  • Abstract paintings
  • Portraits and landscapes
  • Colour layering and blending
  • Decorative and mixed-media projects

Its consistency can range from fluid to heavy-body, depending on the product. Acrylic paint can also be combined with different mediums to change its texture, transparency, or finish.

What Is Texture Paste?

Texture paste is a thick acrylic-based medium used to create raised textures and three-dimensional effects. It is generally thicker than acrylic paint and can hold shapes, ridges, peaks, and patterns after application.

Artists commonly apply texture paste with a palette knife, spatula, stencil, or stiff brush. It can be applied directly to the surface and painted after it dries, or mixed with acrylic paint to create coloured texture.

Texture paste is particularly useful for:

  • 3D wall art
  • Abstract textured paintings
  • Raised floral designs
  • Geometric patterns
  • Impasto effects
  • Sculptural details
  • Mixed-media artwork

Acrylic vs Texture Paste: Key Differences

FeatureAcrylic PaintTexture Paste
Main purposeAdding colour and detailsCreating texture and dimension
ConsistencyFluid to thickVery thick and mouldable
ColourAvailable in many coloursUsually white or neutral
TextureMostly smooth or brush-texturedCreates raised, tactile surfaces
ApplicationBrush, roller, palette knifePalette knife, spatula, stencil
3D effectLimited unless thickenedExcellent for raised effects
DryingGenerally dries quicklyUsually takes longer depending on thickness
Best forColour, details and layeringRelief, depth and sculptural effects

Can You Use Acrylic Paint With Texture Paste?

Yes. Combining acrylic paint with texture paste is one of the most useful techniques for textured artwork. The paste can be mixed with acrylic colour before application, or artists can allow the paste to dry first and then paint over it.

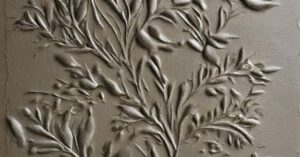
For example, an artist may first create raised floral shapes with white texture paste. Once completely dry, acrylic colours can be added over the textured surface to highlight the raised areas.

Keep in mind that mixing paint into an opaque white paste can change the appearance and intensity of the original colour.

Which One Should You Choose?

The right choice depends on the effect you want to create.

Choose Acrylic Paint If:

  • You mainly need vibrant colours.
  • You want to create detailed artwork.
  • You need smooth backgrounds.
  • You want to blend or layer colours.
  • You are painting portraits, landscapes, or illustrations.

Choose Texture Paste If:

  • You want a raised 3D effect.
  • You are creating modern textured wall art.
  • You want visible ridges, peaks, or patterns.
  • You want to build sculptural details.
  • You want to experiment with palette-knife techniques.

How to Use Texture Paste With Acrylic Paint

A simple technique is to apply texture paste to your prepared canvas using a palette knife. Create your desired shapes, lines, or patterns and allow the paste to dry completely. Once dry, apply acrylic paint over the textured surface.

You can also mix a small amount of acrylic paint into the paste before applying it. Different tools, such as combs, forks, brushes, and palette knives, can create different patterns and textures.

Tips for Better Textured Artwork

1. Build texture gradually:
For deeper effects, building several suitable layers can be safer than applying one extremely thick layer.

2. Let each layer dry:
Thick applications take longer to dry than regular acrylic paint. Drying time depends on the thickness and specific product.

3. Use the right surface:
Choose a stable, properly prepared surface. Some hard texture pastes may be less suitable for flexible surfaces when applied very thickly.

4. Experiment with tools:
Palette knives, combs, stencils, sponges, and stiff brushes can produce very different effects.

5. Paint after drying:
If you want strong colour contrast, allow the texture paste to dry before applying acrylic paint over it.

Acrylic paint and texture paste are not competing materials—they work extremely well together. Acrylic paint provides colour, detail, and visual expression, while texture paste adds physical depth and dimension.

If your goal is a smooth, colourful painting, acrylic paint may be all you need. If you want modern 3D wall art, raised patterns, or tactile textures, texture paste is the better choice. For the most creative results, try combining both materials in the same artwork.
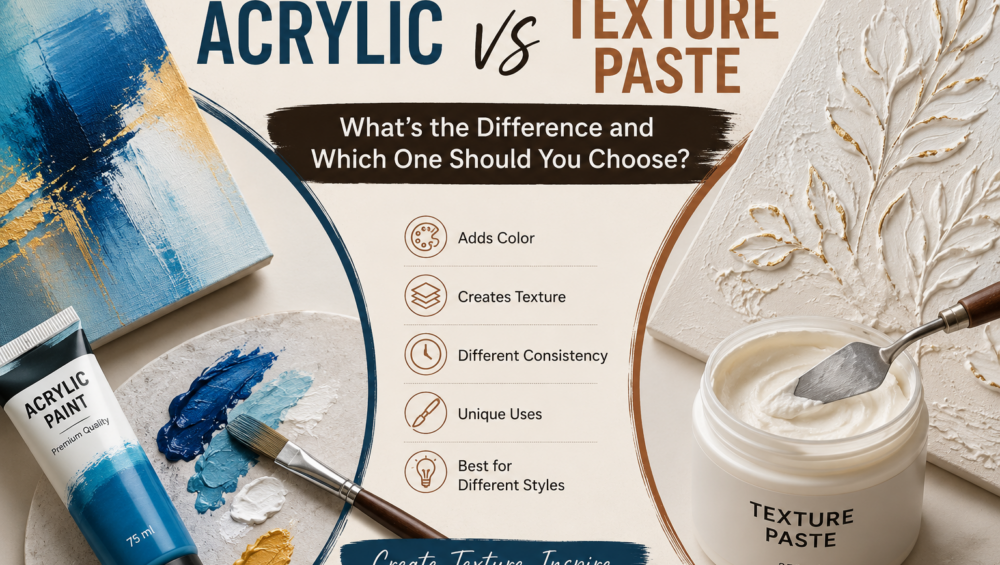
Acrylic vs Texture Paste: What's the Difference and Which One Should You Choose?CategoriesCreative

Acrylic vs Texture Paste: What’s the Difference and Which One Should You Choose?

Texture plays a big role in modern art and home décor. Whether you are creating canvas paintings, wall décor, or DIY crafts, choosing the right medium can make a huge difference. Two of the most popular options are acrylic and texture paste. While both are used in artwork, they serve different purposes.

In this guide, we’ll explain the difference between acrylic paint and texture paste in simple language, helping you choose the right one for your next creative project.

What Is Acrylic Paint?

Acrylic paint is a fast-drying, water-based paint made with acrylic polymer. It is available in many colors and is loved by artists because it is easy to use and dries quickly.

Features of Acrylic Paint

  • Available in hundreds of colors
  • Smooth and creamy texture
  • Quick drying
  • Water-resistant after drying
  • Easy to mix with other colors
  • Suitable for canvas, wood, paper, fabric, and walls

Best Uses of Acrylic Paint

  • Canvas paintings
  • Wall art
  • DIY home décor
  • Abstract paintings
  • Portraits
  • Decorative crafts

What Is Texture Paste?

Texture paste is a thick white paste used to create raised patterns and 3D effects. It is not a paint but a textured medium that adds depth and dimension to artwork.

Once the texture paste dries, it can be painted using acrylic colors.

Features of Texture Paste

  • Thick and heavy consistency
  • Creates raised designs
  • Dries into a hard surface
  • Can be shaped using palette knives and stencils
  • Perfect for 3D artwork

Best Uses of Texture Paste

  • Modern textured paintings
  • Abstract wall art
  • Floral texture art
  • Geometric designs
  • Home décor pieces

Acrylic vs Texture Paste: Key Differences

FeatureAcrylic PaintTexture Paste
PurposeAdds colorCreates texture
ConsistencySmoothThick
FinishFlat or slightly texturedRaised 3D effect
Drying TimeFastLonger than acrylic
Can Be Painted?Already coloredYes, after drying
Best ForTraditional paintingsModern textured artwork

Which One Should You Choose?

The answer depends on your project.

Choose Acrylic Paint If:

  • You want bright and vibrant colors.
  • You are creating traditional paintings.
  • You prefer smooth artwork.
  • You need quick drying.

Choose Texture Paste If:

  • You love 3D artwork.
  • You want premium wall décor.
  • You enjoy abstract and modern art.
  • You want to create unique surface designs.

Can You Use Both Together?

Absolutely!

Many professional artists first apply texture paste to create raised patterns. After it dries completely, they paint over it using acrylic colors. This combination creates stunning textured artwork with vibrant colors.

This is one of the most popular techniques used for:

  • Luxury wall décor
  • Resin-inspired art
  • Floral canvas paintings
  • Modern abstract art
  • Handmade home décor

Tips for Beginners

  • Start with a small canvas for practice.
  • Let texture paste dry completely before painting.
  • Use a palette knife instead of a brush for applying texture paste.
  • Apply acrylic paint in thin layers for better results.
  • Seal finished artwork with varnish for long-lasting protection.

Common Mistakes to Avoid

  • Painting over wet texture paste.
  • Applying very thick layers that crack while drying.
  • Using poor-quality materials.
  • Not allowing enough drying time.
  • Skipping the final protective varnish.

Frequently Asked Questions (FAQs)

1. Is texture paste the same as acrylic paint?

No. Acrylic paint adds color, while texture paste creates raised textures.

2. Can I mix acrylic paint with texture paste?

Yes. You can mix small amounts of acrylic paint into texture paste to create colored textures.

3. Which is better for beginners?

Acrylic paint is easier for beginners, while texture paste is ideal once you’re comfortable experimenting with texture.

4. Does texture paste crack?

High-quality texture paste usually does not crack if applied in thin, even layers and allowed to dry properly.

5. Can I paint over dried texture paste?

Yes. Acrylic paint works beautifully over dried texture paste.

Both acrylic paint and texture paste are excellent art materials, but they have different purposes. Acrylic paint brings your artwork to life with rich colors, while texture paste adds depth, dimension, and a premium 3D look. For the best results, many artists use them together to create eye-catching modern art.

Whether you’re a beginner or an experienced artist, understanding the difference between acrylic paint and texture paste will help you choose the right material for your creative projects and achieve beautiful, professional-looking artwork.

Ranggat brings creativity to life with handcrafted contemporary resin and textured artwork for modern homes.

CategoriesCreative

How We Choose the Right Canvas, Brushes, and Colors for Dot Mandala Artwork

A beautiful and calming art form, dot mandala artwork requires care, accuracy, and attention to detail. The correct selection of canvas, brushes, and colors is the first step in the careful preparation that goes into each delicate dot and perfect symmetry. Each piece at Ranggat is a soulful journey, and the first step is choosing the appropriate tools.

If you’re a beginner or a collector of handmade mandala art, here’s a glimpse into how we choose the perfect materials for dot mandala artwork creations.

1. Choosing the Right Canvas for Dot Mandala Art

Every beautiful mandala starts with a high-quality canvas. We Prefer:

  • Primed Cotton or Linen Canvas: Provides a smooth surface that is perfect for layering dots and durability.
  • Canvas Boards: Ideal for framed or smaller artwork. They are easier to manage and lightweight.
  • Wooden Panels: Used for premium pieces due to their durability and polished look.

We guarantee that the surface is properly primed to accept acrylic paintings without fading or bleeding. This enhances the longevity and vibrancy of the mandala.

2. Selecting the Perfect Brushes and Dotting Tools

A brush isn’t enough for dot artwork. We combine the use of

  • Dotting Tools in Varying Sizes: From toothpicks and embossing tools to professional dotting kits, the objective is to achieve uniform, round dots.
  • Detail Brushes: For finishing flourishes, subtle details, or connecting patterns.
  • Silicone Stylus Pens: Perfect for dots that are smooth and non-smudging.

The right tool helps create uniformity and symmetry, which is crucial in mandala art.

3. Picking the Right Colors for Mandala Art

Colors in mandala art are more than just aesthetics—they carry meaning and emotion.

We consider

  • Color Psychology: Blue for peace, red for energy, and gold for divine connection.
  • Theme & Purpose: Bright reds and oranges may be used in a joyful mandala, while soothing greens and whites could be used in a healing one.
  • Contrast & Harmony: Carefully selected color palettes ensure every dot stands out while maintaining balance.

To make sure every color stands out, we utilize premium acrylic paints that are pigment-rich and fade-resistant.

Final Touch: Varnishing for Protection

A matte or glossy varnish is added after the artwork is finished to preserve the colors and provide a polished appearance. By taking this precaution, the complexity is maintained and is protected from fading or chipping.

Why It Matters

Selecting the ideal canvas, brushes, and colors guarantees that the artwork will endure longer, the dots will be accurate, and the effect will be captivating. Understanding this method helps everyone who appreciates handcrafted spiritual art to appreciate each dot, line, and pattern even more.

Whether you’re an artist or an admirer of handmade dot mandala wall decor, the right tools turn vision into a masterpiece.